Marking an Oral Reading Record Passage
Benchmark Education’s easy-to-use passage mark-up system makes it easy to annotate a student’s ORR assignment. Benchmark Digital ORRs also automatically generate metrics on a student’s performance, providing insight into your students’ reading development. The information obtained from an Oral Reading Record helps inform instruction and accelerates your students’ language and literacy development.
The basic steps for administering an ORR are the same for all reading levels.
Find out how to practice marking an Oral Reading Record in Practice Mode here.
To learn more about marking an ORR passage, watch the video or read the step-by-step guide below.
Passage and Reading Behavior
Your reading record assignment begins after you’ve selected a text from the Student Overview and chosen a method for administering it.
Before you begin:
- Assessment can place significant stress on a student. Be prepared to stop the assessment as soon as you observe the student having difficulty (this may be at the very beginning of the Oral Reading Record text). Say: “I am so sorry. I chose the wrong book for you.” Send the student back to his or her seat and administer a lower Oral Reading Record at another time.
- English learners rely heavily on visual cues when reading English text. Many students are not able to make use of meaning or structure cues yet because of their limited knowledge of vocabulary and English syntax.
- If an English learner reads a word the way he or she pronounces the word in regular speech, the word should be counted as correctly read, even if the pronunciation is not entirely correct.
If you have a specific area of marking Benchmark Digital Oral Reading Records that you would like to explore, use the links below to jump to that section:
Get Familiar with your Oral Reading Record Tools
Completing the Passage Portion of the Assignment
Get Familiar with your Oral Reading Record Tools
Note the Navigation Bar

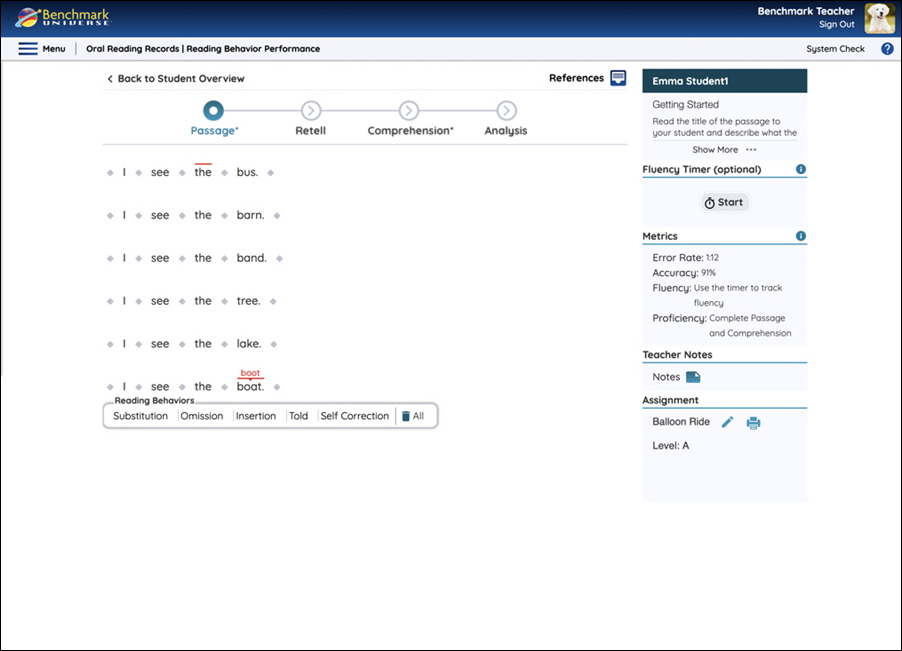
The Navigation Bar displays your progress through an Oral Reading Record assignment. You can use it to navigate to different steps in the assignments. It will tell you which step you’re currently on, which ones you’ve completed and which ones you haven’t yet completed. Both steps have different rules for what has to happen on the page for it to marked as “Complete” with a check mark:
- Passage: mark at least one Reading Behavior
- Retell: answer all rubric questions
- Comprehension: answer all questions
- Analysis: answer at least one rubric question
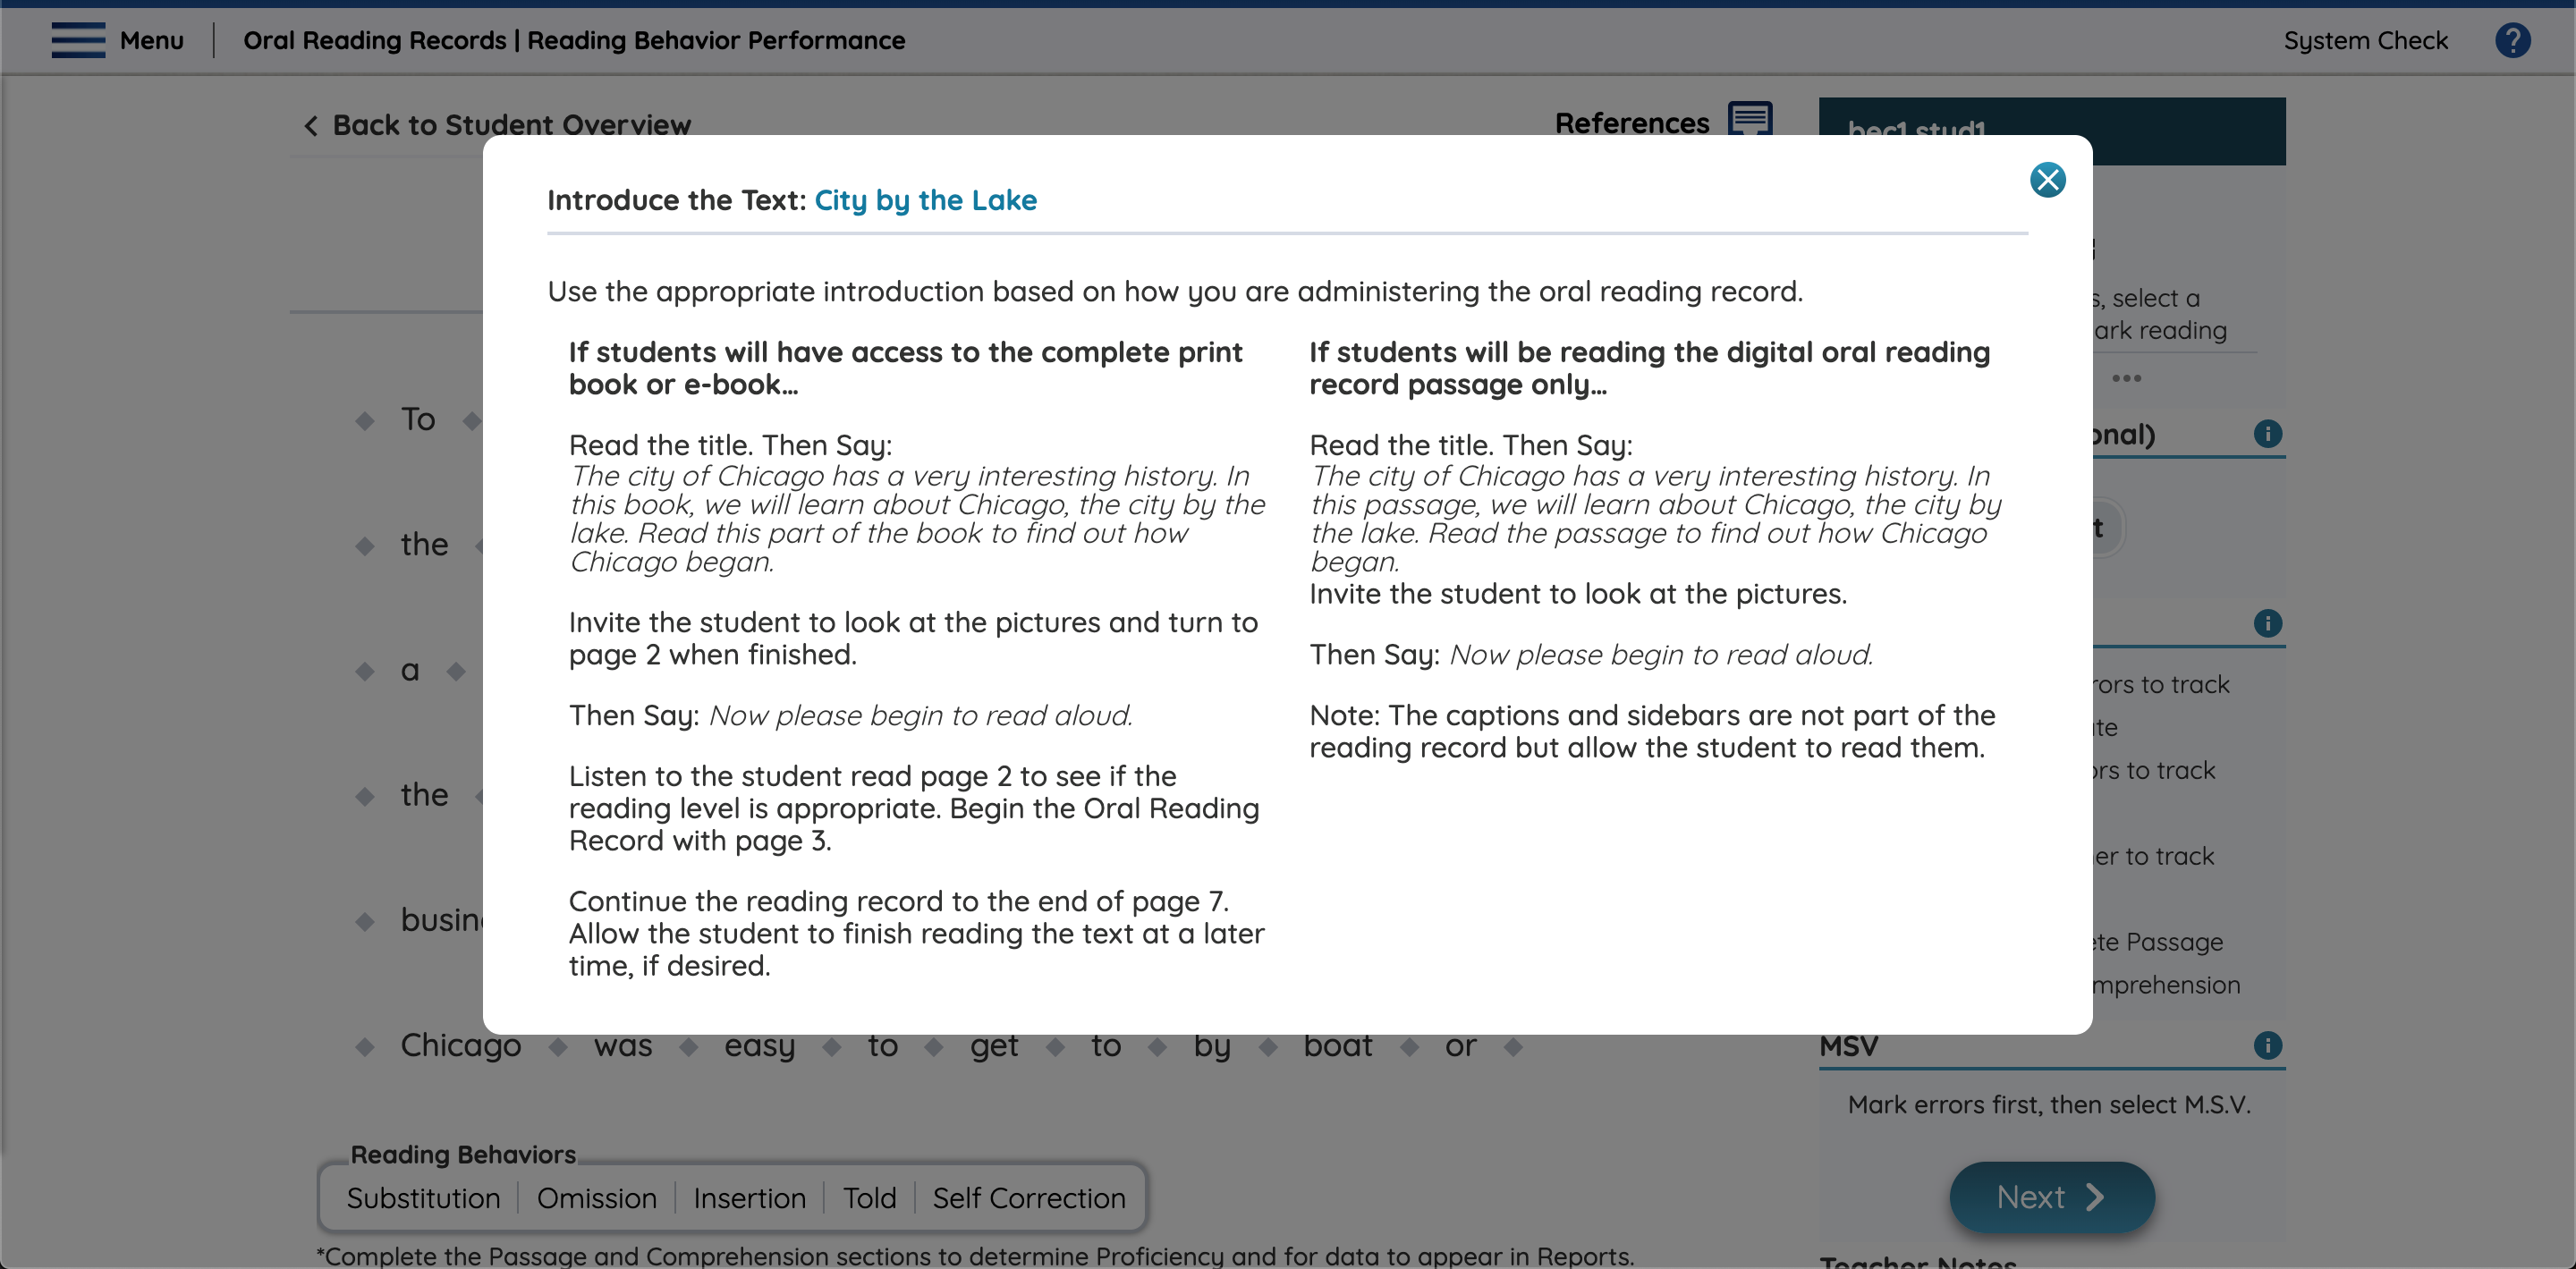
The Introduce the Text pop-up appears when you open the Passage step of an Oral Reading Record assignment. The text explains how to prepare a student for the Oral Reading Record they’re about to read. One column of text describes how to introduce the text if the student is using a print book or the eBook from the Benchmark Universe Library, which allows them to see the entire book. The other column describes how to introduce the text if the student is only reading the digital or printed out Oral Reading Record passage, which includes just the Oral Reading Records section of the passage. If necessary, you can scroll to see the entirety of the introduction.
When you’re done introducing the text, close the modal and ask your student to begin the Oral Reading Record.
If you need to open the Introduction again, select the Introduce the Text link in the Getting Started section at the top of the Sidepanel on the right of the Passage step.
Check the Getting Started Dropdown
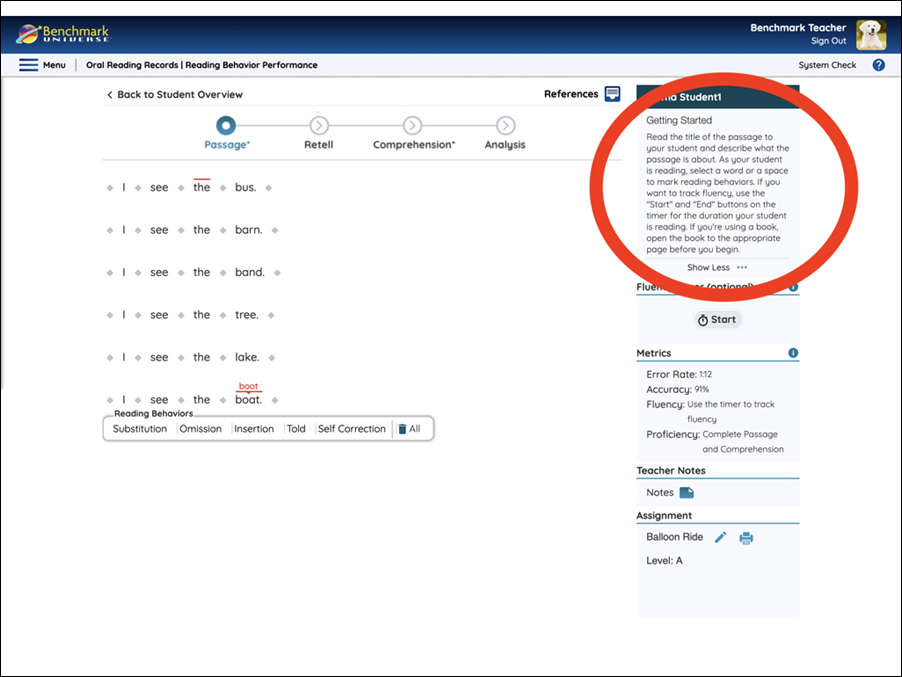
The Getting Started dropdown gives you basic instructions at each step of an Oral Reading Records assignment. Click on Show More, if visible, to see more text.
Use the Fluency Timer (Optional)
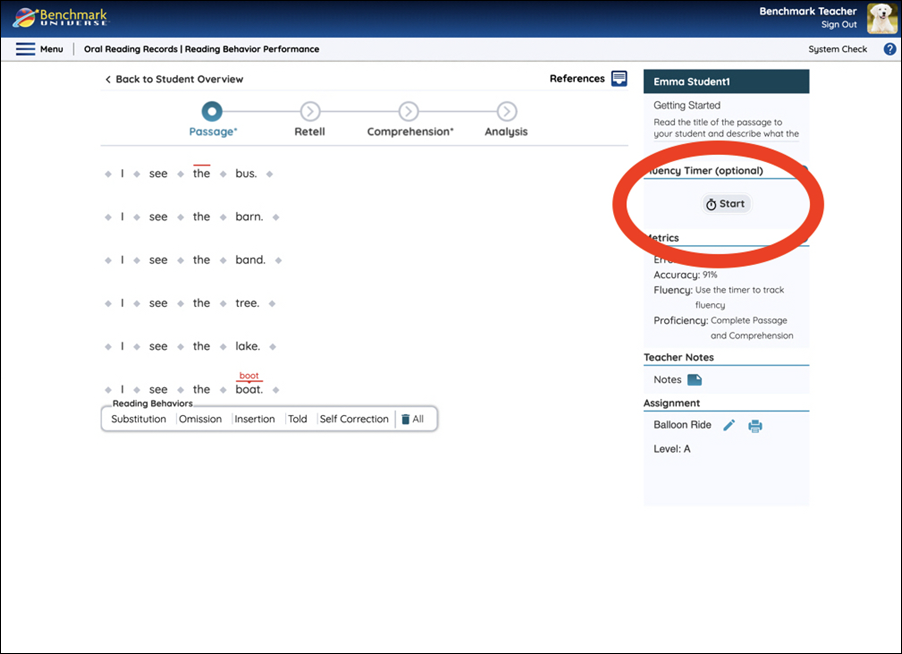
If you want to track fluency, use the Fluency Timer while your student reads the passage from start to finish. The Fluency Timer tracks your students’ Words Correct Per Minute (wcpm) rate. The Fluency Timer counts how many words your student read correctly and how long it took your student to finish reading the assignment
Use the References page to view the Oral Reading Records fluency norms for both Spanish and English.
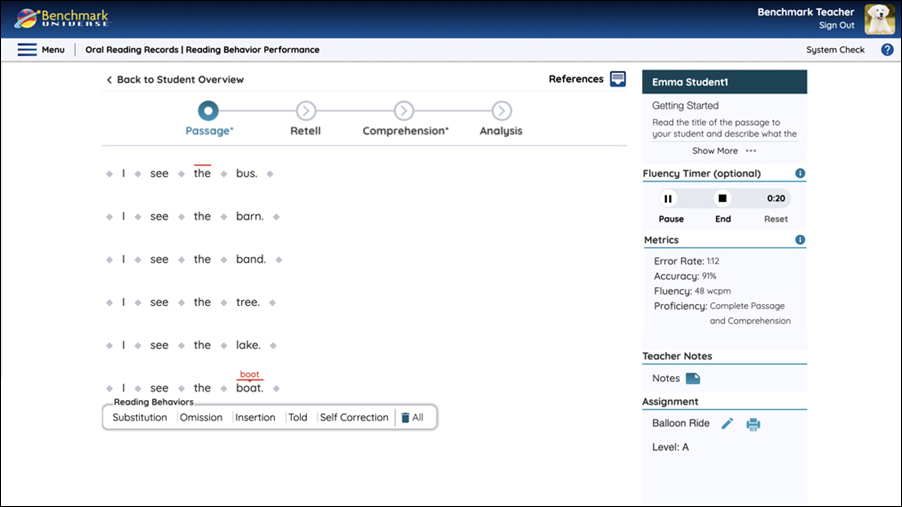
To evaluate a student’s fluency rating select the Start button to start the timer when a student begins reading. At any time, select the Pause button to pause the timer if there is an interruption in the student’s reading — then select the Resume button to unpause the timer. Use the Reset button to restart the timer. When your student finishes reading the text, press the End button. Your student’s Words Correct Per Minute will be calculated.
If for whatever reason you wanted to continue timing the student’s reading from the time at which you selected End button, the Resume button will start the timer again from where you left off.
Click the Fluency Timer information (i) icon to display information about using the Fluency Timer.
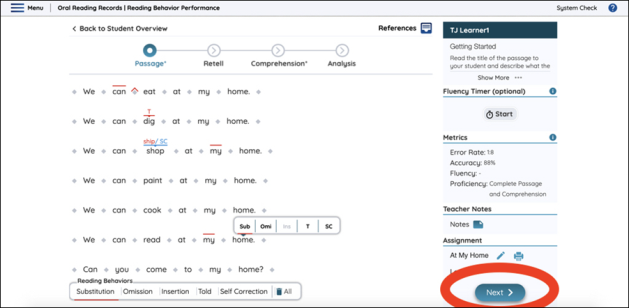
Annotate a Student’s Reading
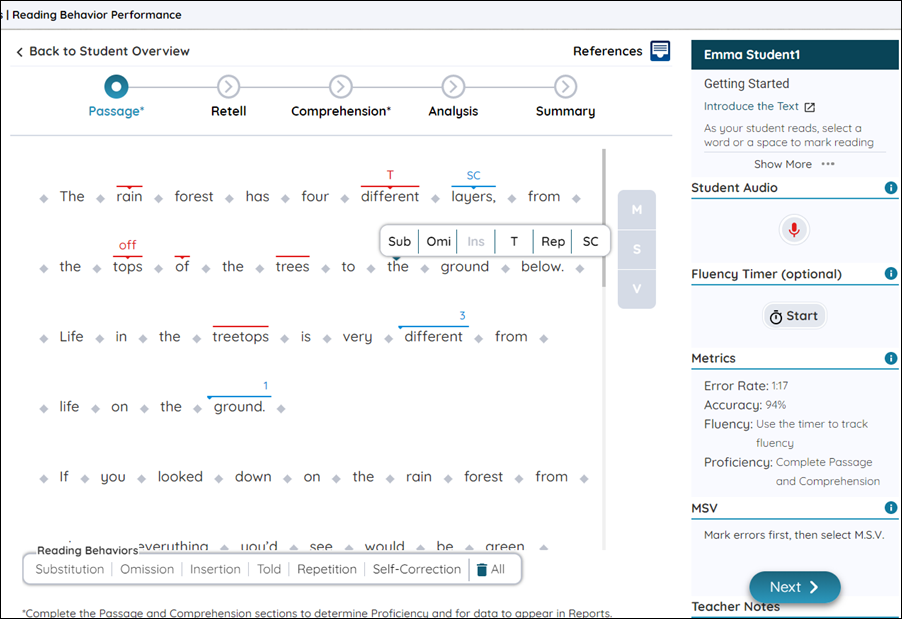
As the student reads the text, listen carefully and follow along on your teacher version of the text. Mark the student’s reading behaviors by selecting any word or diamond in the text and using the reading behavior icon buttons in the pop-up tooltip. A diamond represents a space between words and is used to mark where a student inserted a word into the text that wasn’t there.

|
Observe without offering assistance, and mark every observed behavior. |
Types of Reading Behaviors
 Substitution ("Sub"): when the student makes any change to a word they read from the printed text. Write the error in the text box that appears when you select "Sub". When a student repeats an error for a proper name, count the error once. When a student makes an error on a number, such as a year, do not mark it as an error.
 Omission (”Omi”): when the student leaves out a word while reading the text.
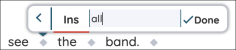
 Insertion ("Ins"): when the student adds a word to the text. An insertion is added by selecting a diamond in the text (which represents a space).
 Told (“T”): when the student gets stuck on a word or asks for help and is told the correct word.
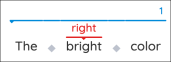
 Self-Correction (“SC”): the student self-corrects a word they’d previously read incorrectly. A self-correction is not counted as an error. If a self-correction is added to a word or diamond that has an error, that error is not counted towards the students' Error Rate or Accuracy percentage.
Teachers can use either “Told” or “Self-Correction” alongside other reading behaviors on a single word or diamond. Though “Told” and “Self-Correction” cannot be used with the same word or diamond. For instance:
- Omission and Told:

- Substitution and Self-Correction:

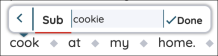
Marking “Substitution” and “Insertion” on the passage produces a text box to enter the text the student substituted or inserted. Select Done or press Enter when you’ve typed in the substitution or insertion:
- Marking a Substitution error:
- Marking an Insertion error:
You can also create a “Substitution” or “Insertion” error symbol without including the text of the error.
Click on the left arrow (<) button to get back to the main reading behavior tool tip.
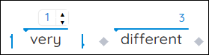 Repetition (“Rep”): the student repeats a word they’d previously read. A repetition is not counted as an error. When adding a repetition teachers can select the number of times a student repeated a word through the up and down selection arrows. They can also show that a student has repeated multiple words by grabbing and dragging the blue indicators on either side over the words that were repeated. The user cannot drag a repetition across another repetition marking. When the teacher is finished adjusting the repetition behavior, they can select any other word on the Passage to complete the process.
|
|
The teacher can add a behavior to a word under an existing repetition marking. Just select the word or diamond underneath the repetition and add the behavior as you normally would.
|
Removing an Error

The Trash icon appears when you select a word or diamond with a reading behavior. Use the Trash icon to remove the selected reading behavior.
Reading Behaviors Bar

The Reading Behaviors Bar at the bottom of the page displays the full names of the reading behaviors in the reading behavior tooltip. A line appears under each reading behavior in the bar as the user hovers over the buttons in the reading behavior tooltip.
Remove All Errors

Trash All icon on the Reading Behaviors Bar discards all marked reading behaviors.
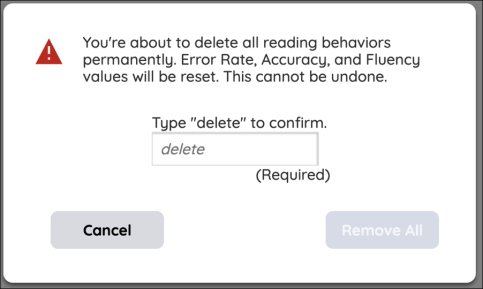
When you click the Trash All icon, a box appears. Type the word “delete” to confirm the deletion of all marked reading behaviors and then select Remove All.
Completing the Passage Portion of the Assignment
Once you’ve finished marking the passage (and stopped the timer, if applicable) press Next to evaluate the student’s comprehension of the text.
Is Your Student Done Reading?
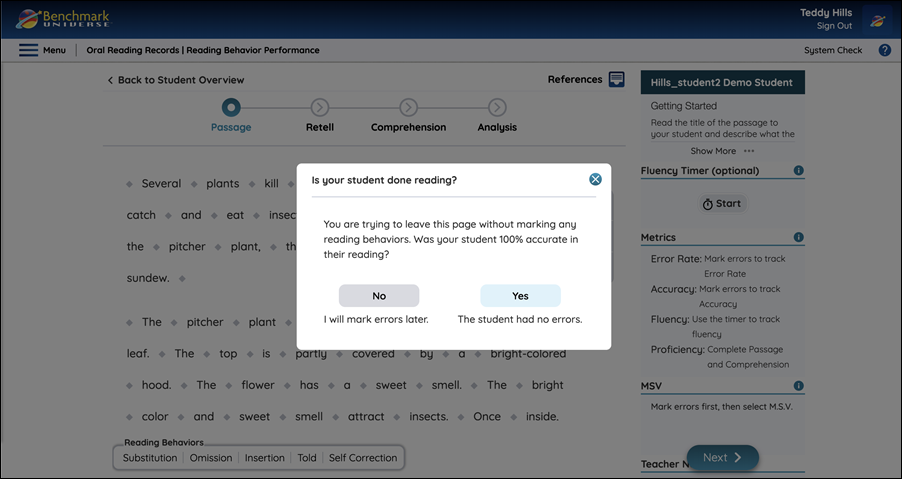
Sometimes a student will read a Passage without making any errors at all. If you try to go to another step in the Oral Reading Record without marking any errors, you’ll see a message asking whether your student was 100% accurate in their reading. If you select Yes, the student’s Accuracy will be marked 100%.
If you select No, the Passage will remain ungraded. You can always return to complete the Passage step later.
You can also select the (x) button in the top right of the message to stay on the Passage step.
Frustrational Proficiency Warning

If a student has made enough errors to reach the Frustrational level, a warning will come up and suggest that the user mark the text Frustrational. The user can then select Continue Session, which will allow the teacher to continue tracking the student’s reading, or the user can select Mark Frustrational, which will end the reading and mark the student’s proficiency as Frustrational. A student does not need to answer the Comprehension questions once a record has been marked Frustrational.
Benchmark Education recommends that students who are reading a text at a Frustrational level be told, “I’m sorry, I chose the wrong book for you” and give the student a brief break from reading before being evaluated again.
|
|
An assignment remains in the Current Assignments section until the student has read the passage, the teacher has recorded their reading behaviors, and all the questions in the Comprehension section have been answered. See Manage a Student's Current Assignment for more information. |
Understanding the Metrics
To learn more about Metrics, watch the video below.
The Metrics Section displays your student’s Error Rate, Accuracy, Fluency, and Proficiency performance on that record. As you mark errors, the metrics change. The metrics are:
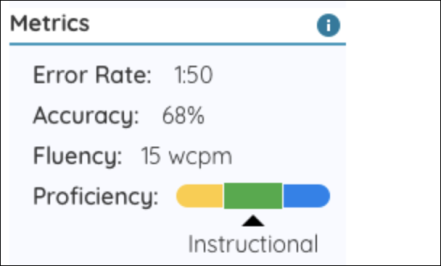
- Error Rate: the number of words in the passage divided by the number of errors your student made. If the rate is 1:10, it means your student made 1 error for every 10 words read.
- Accuracy: (total words in the passage minus # of errors) divided by total words in the passage, multiplied by 100.
- Fluency: the number of words the student read correctly divided by the number of seconds it took your student to read them, multiplied by 60.
- Proficiency: appears once a teacher has completed both the Passage section and the Comprehension section. To learn more about Proficiency levels, go to Record a Student’s ORR Comprehension.
Click the “i” icon to read information on Metrics:
MSV Coding Systems
In order to do formative assessment and gather data during reading, a shorthand is needed to code the data.
The symbols MSV are used in the coding system of reading records. This code is not intended to fully represent all sources of information used in decoding and problem-solving and the reading work that is being done. For example, a teacher might note whether the reader raised their voice to indicate the sentence is in question format. These kinds of notes are essential when taking an oral reading record and reflect yet another source of information gathered in this assessment. See Create a Note below for more information on Notes.
Whether or not you choose to use guided reading in your program, we consider this shorthand both a useful tool when administering oral reading records, and an invaluable window into student reading behaviors.
Meaning (“M”) sources of information, also known as semantic sources, relate to the author’s intended message and purpose as well as the reader’s background knowledge and identification of particular concepts found within the text. Graphic features such as pictures, diagrams, and maps also help the reader gain access to the text’s meaning.
Structural (“S”) sources of information, also known as syntactic sources, are derived from the reader’s oral language and exposure to book talk that allows him or her to predict upcoming text and anticipate the next word or phrase that might occur. More experienced readers monitor grammatical substitutions by asking, “Does it sound right this way?”
Visual (“V”) sources of information, also known as graphophonic sources, relate to the letters, sounds, and words incorporated into a text. These elements require the reader to access visual information in order to problem-solve. Processing visual information includes the essential sound/letter and letter/sound learning, print directionality, orientation, letters and categories of letters, using clusters of letters, coding visual signs, and the perceptual span.
Marking MSV
.png)
If you have time, you can mark MSV sources of information while your student is reading, or wait until your student has finished the passage. You can also mark them after your student completes the Retell and Comprehension.
Use the blue MSV selector panel to the right of the passage text to mark MSV. As soon as you record a reading behavior (or click on a word or diamond that already has a reading behavior), you can select the M, S, and/or V button on the selector to mark a word. It will be added inside a small blue box to the right of the Reading Behavior and the letter in the panel will appear dark blue.
.png)
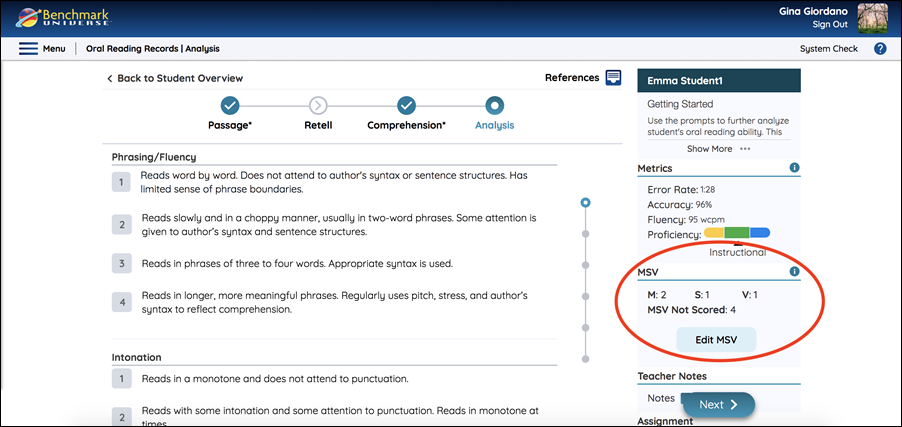
As soon as you mark M, S, or V, the application will track each type of source of information used.
If you add a M, S, or V to a word that has two Reading Behaviors marked on it (such as Omission and Told), it will apply to both of the reading behaviors on that word and will be counted twice – once for each reading behavior.
If there is any reading behavior for which an MSV is not noted, it will be counted as MSV Not Scored.
_334x855.png)
A full summary of the marked MSV appears on the Analysis page.
Create a Note
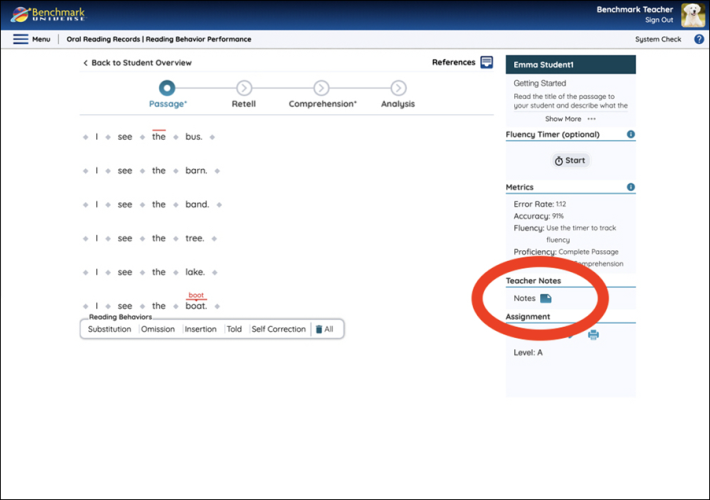
Access the note entry window by selecting the Note icon.
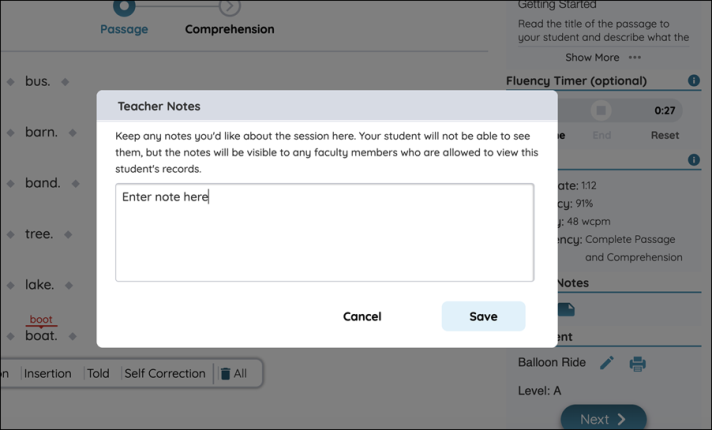
Type in the text box and press Save to attach the note to the student’s reading record. This note will not be visible to students, but will be visible to administrators who are allowed to see the student’s performance. Press Cancel to discard a note. Once you’ve created a note, you can read or edit it by selecting the note icon again. When there is a note saved, the note icon will update to the following icon: